

Want to revamping you room decor? When adding new paint, runs, new art etc, try this additional touch of adding a paper covered switch plate. This can be done with prepurchased craft paper, wallpaper, or digital printable paper. It is a neat and unexpected way to add some additional personality to your room.
Supplies needed:
- Craft paper or or digital paper kit of your choice
- Glossy Mod Podge
- pencil
- cutting mat & exacto knife or sharp pointed scissors
- paintbrush
- switch plate
- Sandpaper
- Spray sealer
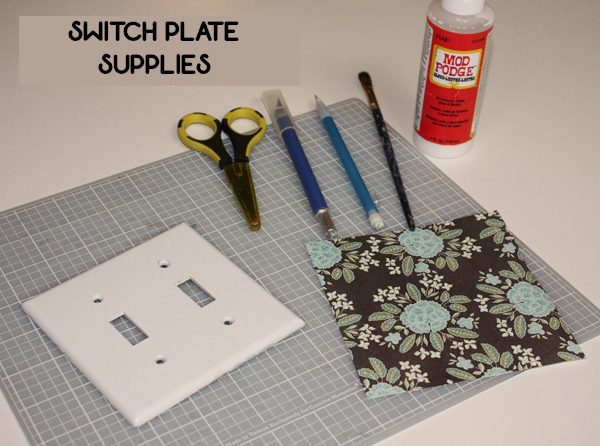
1. Remove your switch plate from the wall and measure it. Give yourself about 1/2 inch larger than your measured size to allow for the paper to fold over onto the back.
2. Print your chosen paper to size or cut purchased paper to size. Use a regular copy paper thickness. You do not want to use cardstock or a thick paper as that would make it difficult to adhere the paper to the rounded corners.
3. Put your paper face down and center your switch plate face down on top of that. With your pencil, trace around the opening for the switches. Make little pencil marks on the corners of the paper to indicate where the corner of the switch plate is. It does not have to be exact.
4. Next is the initial cutting. Instead of cutting out the spaces for the switches, use the pencil lines as a guide and cut an “X” inside the rectangle. Next, cut a small triangle off each corner of the paper. This will make the edges less bulky.

5. Lightly sand your switch plate. You can skip this step, but a light sanding does help ensure that the paper adheres better.
6. Brush a light coat of Mod Podge on the back side of your paper and on the front side of your switch plate. Leave the paper face down and then place the switch plate face down on top of that, using the switch openings as a placement guide. This is the easiest way to get everything centered.
7. Smooth out any bubbles. Fold the “X” in and behind the openings for the switches. You can trim it as needed. Then, work all the way around the edge of your switch plate to adhere your paper to the edge and corners. Glue well the amount that folds to the back.
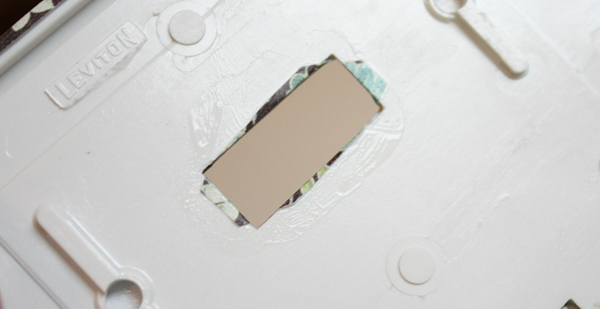
8. Now take care of the screw holes. It is easier to cut those from the paper once it is already on the switch plate instead of trying to line up the circles when doing the Mod Podge. If you gently press with your finger, you will see an indentation where the screw will go. Trim that away easily with your exacto knife. The screw will hide any imperfections.

9. Cover the plate with a couple coats of Mod Podge. You can use something like a plastic cup to elevate the plate from the surface to make it easier to work with. Once dry, spray it with a sealer in order to protect it and allow for easy cleaning.

You can also use this process to make matching outlet covers. This switch plate cover project is quick and easy and is also budget friendly.

Pin This!

Leave Your Comments