
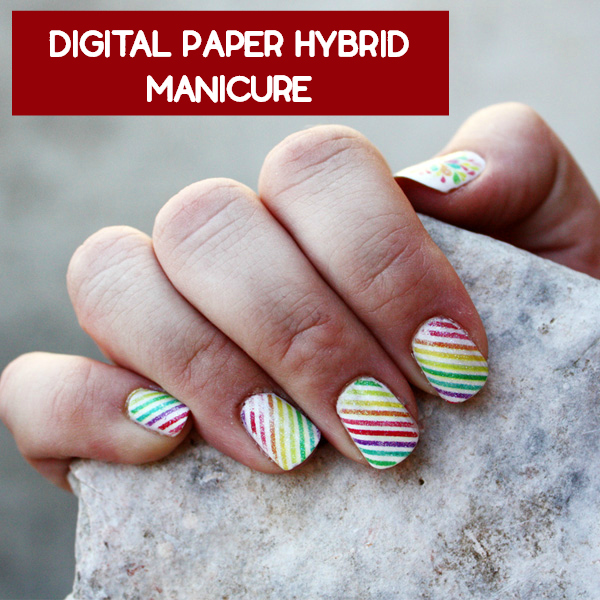
Pinterest is a great source for nail art and one product that is hot are adhesive nail polish strips with funky designs and bold colors. But they are also a bit pricey. So, here is a DIY crafty alternative. Get out your digital scrapbooking supplies or digital papers and make a hybrid manicure!
Note that this project uses a laser print of digital scrapbook paper. Inkjet prints are not recommended as the printing technology is different. Ink bleeds into the paper whereas with a laser copy/print, the image “sits” on top of the paper making it easier to transfer. You can try ink jet, but it usually does not work effectively. “Real” scrapbook paper bought from the store might also not work. The key is a laser print. This look can also be done using newspaper. You can get digital paper on Etsy.
For your digital paper hybrid manicure you will need the following:
- light color nail polish (white, light pink, cream, pale green, light turquoise etc.)
- rubbing alcohol
- small cup, such as a medicine cup
- digital papers. Simpler designs work better.
- nail polish topcoat
1) Before getting started, measure your fingernails. This doesn’t need to be precise, but it’s nice to have a general idea.
2) Open a new Photoshop document and create 10-15 boxes that are just a bit larger than your nails. Something around 3/4 inch square will work. You are making a few extra boxes than 10 to account for mistakes. Or, if you use something like Picmonkey, make a custom collage with 10-15 boxes.
3) Import your digital paper designs. You will likely need to reduce the scale of your paper so that the design will better fit your nails. Clip your papers to the boxes that you created.
4) Print your page. This tutorial used a laser printer. Cut out all squares and set aside.
5) Paint your nails with your light colored nail polish, you may need multiple coats for an opaque base color. Let your nails dry thoroughly.
6) Pour your alcohol into the small cup. It should be deep enough that it can cover your finger.
7) Working with one nail at a time, dip your finger into the alcohol for 3-5 seconds and completely wet the nail. Immediately press one of the paper squares onto your nail, image side down. Do not move the paper around, but press on very firmly so that it is completely adhered. Leave on for approximately 30 seconds and lift to remove. If you notice that some paper fibers have been left behind, gently rub them away with a damp finger. Repeat for all fingers.

8) Paint a topcoat on your nails to protect. A glittery nail polish can also be used as the topcoat.
The manicure can last about a week and there usually is no fading.

Pin This!

I tried this method step by step and it didn’t work for me. the only difference was that I applied plain, fake nails from Kiss before putting the white polish on. When I tried to apply the design, nothing happened.
I did, however, find a method that worked really well!
after the first time I tried didn’t work, I removed the white nail polish and tried applying the design directly to the plain, fake nails which i had glued on. using alcohol didn’t work when I tried this so I decided to see if using acetone nail polish remover work… and boy, did that do the trick! instead of dipping my finger into the nail polish remover, I dipped the small piece of paper into the remover and then pressed it on my fake nail. the design looked perfect! the only issue, however, was that the design also was applied to the skin around my nail and it was very hard to get it off without messing up what was left on my fake nail.
I decided to give it an other try when it was time to apply a new set of fake nails. But this time, I applied the design to each nail before gluing the nail to my finger in order to avoid having to clean up the skin around my nail. this worked perfectly! after gluing on each nail, I was able to file them without messing up the design and then i applied a clear top coat.
hopefully you guys can have some success with the way I did! And thanks so much, Ccouch, for posting such a wonderful idea! 🙂
Hey guys! I just spent THREE hours figuring this out… but I FINALLY got it, and I LOVE them. I had to do it differently for it to work though. I painted my nails silver, and printed out just basic navy stripes (I thought I’d start simple). I stared by dipping my nails in alcohol and sticking the paper on… but the transfer just didn’t work too well for me. What ended up working was wetting the paper with the alcohol, pressing it onto the nail, applying quite a lot of pressure, and making sure to apply pressure especially to the ends of my nail (because they’re long) and the sides of the nail. I peeled it back after the alcohol dried, just enough to see if the entire thing transferred, if not, I laid it back down and wet the back of the paper with alcohol (since it just absorbs, the front gets wet too) and I just applied pressure again, especially to the places that hadn’t transferred :). It took a while, but now it’s REALLY easy, and they turned out GREAT. Next time… I’m doing SNOWFLAKES!
Hope this helps ladies!
Here’s what I did:1. cut out the squares; 2. paint nails with white; 3. here’s where i did it differently, get the squares wet with water; 4. place on the nail; 5. dunk whole finger tip with the paper in rubbing alcohol; 6. press it on for 7-10 seconds; 7. Done! There will be little pieces of paper left behind but they peel off after your nails dry completely. It took a few times of trial and error to get it to come out right but I am pretty much obsessed now. I used laser jet print and standard paper. But get this- I just tried it with a plain old piece of scrapbook paper and that worked too!