

Today I’m going to show you how to create a spooky house using the Milk Carton Template Set by Kelleigh Ratzlaff. I decorated the house using an absolutely gorgeous brand-new Glamourween kit from ETC by Danyale…it’s so new that it’s not even in the shop yet! It’ll arrive on Thursday, September 29. Enjoy your sneak peek, this kit is just fabulous!
Supplies I used:
- Milk Carton Template Set by Kelleigh Ratzlaff (Update: you can get milk carton templates on Etsy)
- Glamourween kit from ETC by Danyale,
- Epson Premium Matte Photo Paper

- red line tape
- scissors
- embossing stylus
- Fiskars Paper Trimmer

- Licorice Premium Dye Inkpad by ColorBox and Stephanie Barnard
To start, I opened the small milk carton psd file in Photoshop . To create the window, I selected the rectangular marquee tool and drew a rectangle on the template. Then I pressed delete and this created an empty space where I could build my window scene.
I created a clipping mask just a bit larger than the window I created, and clipped one of the damask papers to it to create wallpaper. Then I added the frame, cat, curtains, and candelabra. The cross bars were taken from the birdcage element in the kit.
To achieve the shadowing on the window, I applied a drop shadow style to the box with a blend mode of Linear Burn, Opacity set at 88%, 45° angle, 0 px distance, 10 % spread, and 44 px size. I clipped the grey stripe paper to the box. Next, I added the iron fence to all sides of the box. Then I added the broom and zebra pumpkin just outside of the window.
The best way to create the roof is to make a clipping mask that is 4″ high x 2.5″ wide. These measurements allow for a 1/2″ overhang at the bottom. I goofed and ended up piecing mine together. Learn from my mistake!
I printed the canvas onto Epson Premium Matte Photo Paper. Next, I cut out the milk carton using both my Fiskars paper trimmer and my scissors.

I used the embossing stylus to score along the fold marks. I added red line tape to the edge of the template and then adhered the edges together to join the sides of the box together.

I folded the bottom of the box together by following the instructions that are included in the Milk Carton Template Set.

Because I wanted a flat roof line, I added more red line tape to the inside edges of the milk carton. This action seals the box for good, but you can still fill it with treats by unfolding the bottom of the box.

I folded the edges together and then folded them down toward the back of the box. I added more red line tape to the outer edge to keep it down.
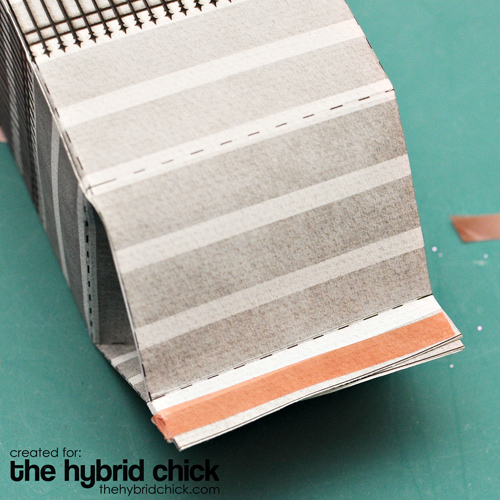
Now it looks less like a milk carton and more like a little house, which is exactly the look I’m trying to achieve.

If I had used one rectangular roof piece that was 4″ x 2.5″, I would have scored the roof in the middle and 1/2″ in from each short end but instead I had to attach the two roof pieces to the top of the milk carton. I again used red line tape. Finally, I used a sponge to apply black ink to the edges of my spooky house.

I really like how it turned out. I can see quite a bit of potential in using this milk carton template for other houses – a gingerbread house for Christmas, a flower shoppe for spring, and a school house in September!
Leave Your Comments